Using altering tree functionality you can alter family tree graphical presentation
for best viewing experience while maintaining app specific graphical coherent integrity.
Altering tree introduced in v. 4.6.7 is in a pilot stage yet and we encourage
you to alter the copy of the original family tree.
To begin, you have to select one or two persons whose you want to move
using double click or double tap. Then invoke popup menu using right mouse click or press and hold on
touch screen and choose "Modify/Print Tree" menu item which, in turn, opens top app bar. Locate and
select “Alter Tree” button on the right side of the top bar:
|
 Fig.1 Fig.1
|
 Fig.2 Fig.2
|
Top bar will change its appearance showing set of buttons dedicated
to altering tree: “Alter Selection” activates custom selection, “Reset” resets tree modification
before modifications applied, “Apply” applies tree modification, “Undo” and “Altering issue display.:
|
 Fig.3 Fig.3
|
Person’s template ready to be moved changes its background color to
green and green dotted outline around is created. Press mouse or tap anywhere inside green
dotted outline changes cursor shape, all the objects inside green dotted outline will follow your
mouse as long as you keep it pressed:
|
 Fig.4 Fig.4
|
In order to maintain tree graphical integrity there are several mandatory
requirements must be kept: connections between family members either strictly horizontal or strictly
vertical, every person template should be located inside imaginary grid cell, line connected two adjacent
person templates must have minimum length of imaginary grid cell length, no overlap allowed ….
|
 Fig.5 Fig.5
|
When there are no requirements violations “Apply” button becomes
enabled, click on this button initiate tree modification.
Before tree modification applied it can be reset using “Reset” button:
|
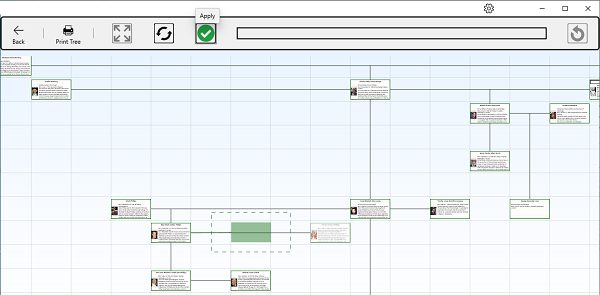 Fig.6 Fig.6
|
To select and manipulate group of more than two adjacent persons
located vertically, like several siblings, you need to select upper-most and bottom-most ones
then click “Alter Tree” button.
|
App also allows user to customize human templates selection to
change their position, let say you want to relocate group of 3 human templates
shown in bold on Fig.7:
|
 Fig.7 Fig.7
|
To begin custom human templates selection any person or persons
should be selected as it’s described before, see Fig.1 and “Alter Tree” button on the right side
of the top bar should be clicked, see Fig.2.
App suggests you person's selection, to customize
this selection "Alter Selected Area" button on the right side of the top bar should be clicked:
|
 Fig.8 Fig.8
|
Green dotted line border around selected area will be replaced
with solid blue border, it's the way custom selection is marked:
|
 Fig.9 Fig.9
|
This custom selection area can be resized and removed to
cover group of human templates needed to be modified:
|
 Fig.10 Fig.10
|
While changing custom selection it can be reset, when finish – click on “Apply”:
|
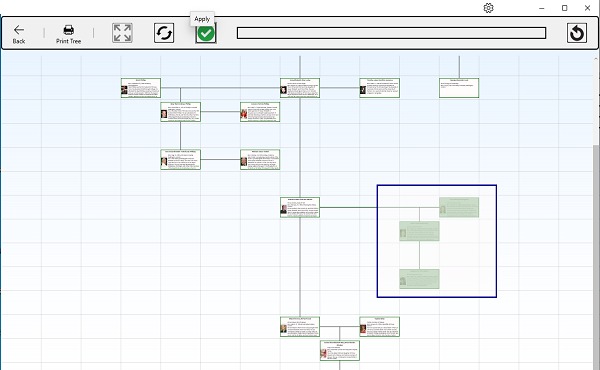 Fig.11 Fig.11
|
Selection area ready to be moved changes its background color back to
green and green dotted outline around appears again, see Fig.4:
|
 Fig.12 Fig.12
|
User can manipulate with selected area exactly how it described before, see Fig.5:
|
 Fig.13 Fig.13
|
When there are no requirements violations “Apply” button becomes enabled,
click on this button initiate tree modification, like it described before, see Fig.6:
|
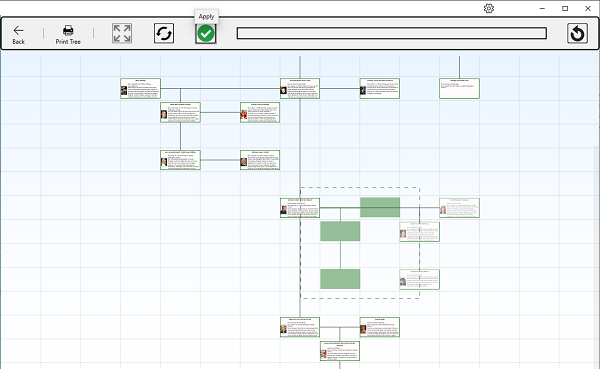 Fig.14 Fig.14
|
Right mouse click or press and hold on touch screen on any free of people templates Family Tree space dismisses top app bar and terminates tree altering.
|